Plate Solving Calibration
The Plate Solver engine works in three steps:
- It first crops the image according to configured
Margin - It then detects star or planet shaped objects in the image.
- It then uses these detected objects to "solve" the direction in which the camera was pointed. For fast solving, this step requires the FOV of the image to be configured.
Step 1. Cropping
Adjust the margin to crop out any foreground objects, such as trees or buildings.
Adjust the gradient removal strength to remove the effects of light pollution.
Step 2. Detection (automatic)
The detection happens automatically using Neural Networks.
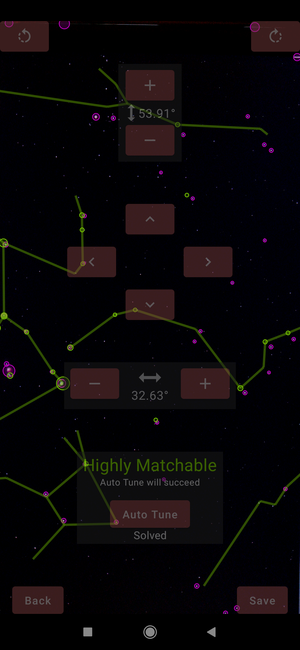
The detected objects will be marked with Magenta circles.
Step 3. Solver calibration

This screen might look intimidating at first, but don't worry, the idea is simple. And you only need to do this once.
The engine will make a guess and show where it thinks the camera is pointing. A map of stars and constellations will appear super-imposed on the detected objects.
If this guess looks right, that is, the objects are very nearly matching, you can "Save" the calibration.
Otherwise, you can use touch gestures to adjust the position. You can move the guessed position, or rotate it. You can also zoom in or out by adjusting the FOV.
When the position looks nearly aligned you can use the Auto-tune button. When it says Matched the overlay will turn green.
When everything looks satisfactory, click the Save button. The calibration will be remembered until it is over-written by a new Save.